Settings
Sessions
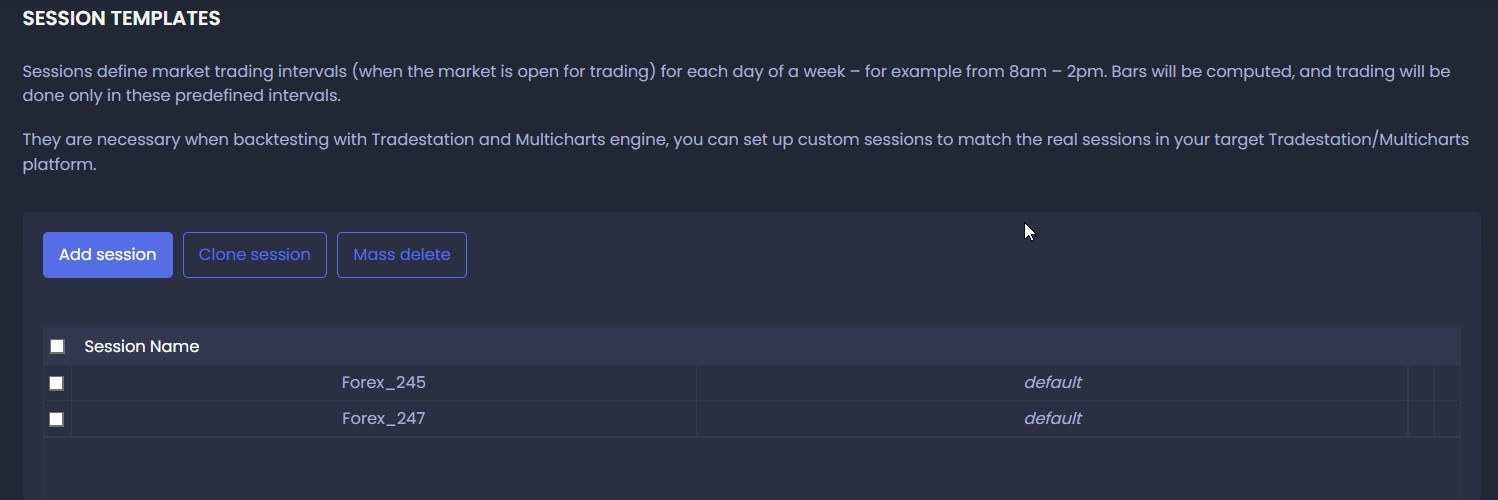
Sessions define market trading intervals (when the market is open for trading) for each day of a week – for example from 8am – 2pm.
Bars will be computed, and trading will be done only in these predefined intervals.
Sessions are necessary when backtesting with Tradestation and Multicharts engine. They define market trading intervals for each day of a week.
You can set up custom sessions to match the real sessions in your target Tradestation/Multicharts platform. By doing this, you will be able to get reliable backtest results matching with real trading.
You can USE a session by configuring one in Session option in Editor's Trading Options.
Please note that the Session option is available for Tradestation and Multicharts backtest engines only, it will be hidden and not used for the other types of engines.
There are two default Session options - Forex_245 and Forex_247. These cannot be modified or deleted.
You can define your own session by clicking on Add session button. This will create a blank session template.
Another option is to select an existing session and clicking on Clone session button.
This will show a name input dialog where you can fill the name of the new session. After submitting, a copy of the original session will be made.
You can modify it afterwards. You can modify existing sessions by double clicking them.
In Edit session template dialog you can see a list of session times:
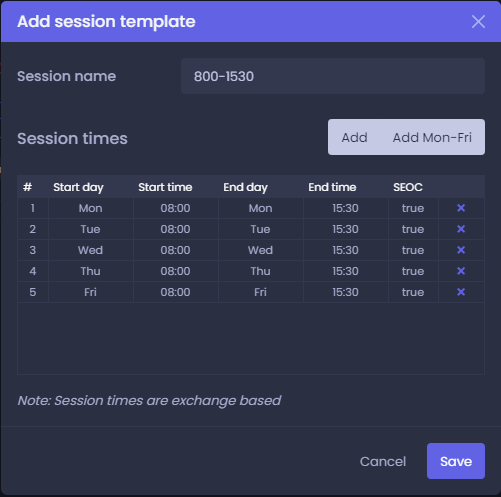
These can be modified or deleted by clicking on the x link next to them.
To modify a session time, double click it.
An Edit session time dialog will show up where you can alter days and times:
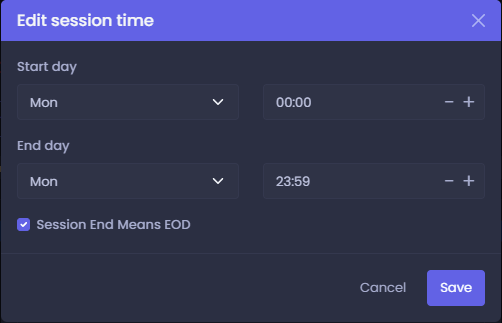
For time inputs, please use a fixed format HH:MM and fill in the hours using 24h scheme.
The checkbox on bottom indicates if the end time is also the end of the trading day.
Tip: When modifying session times, you can use an Add Mon-Fri button feature. When you create monday session time and click it, it will automatically create the same session times for the rest of the week.
Custom indicators
Custom indicators section allows you to add custom indicators into the final source code of the strategy.
If you can't find your favorite indicator in editor's options,
this section will help you develop customized strategies that will use any indicators you want.
Please note that custom indicators only serve to add custom code into the final source code of the strategy.
A strategy using custom indicators therefore can't be backtested, because we are missing the indicator's real implementation during backtest.
You can add a new custom indicator by clicking the Add new button. In Add new Custom indicator popup, you define the name of the indicator, it's parameters and outputs:
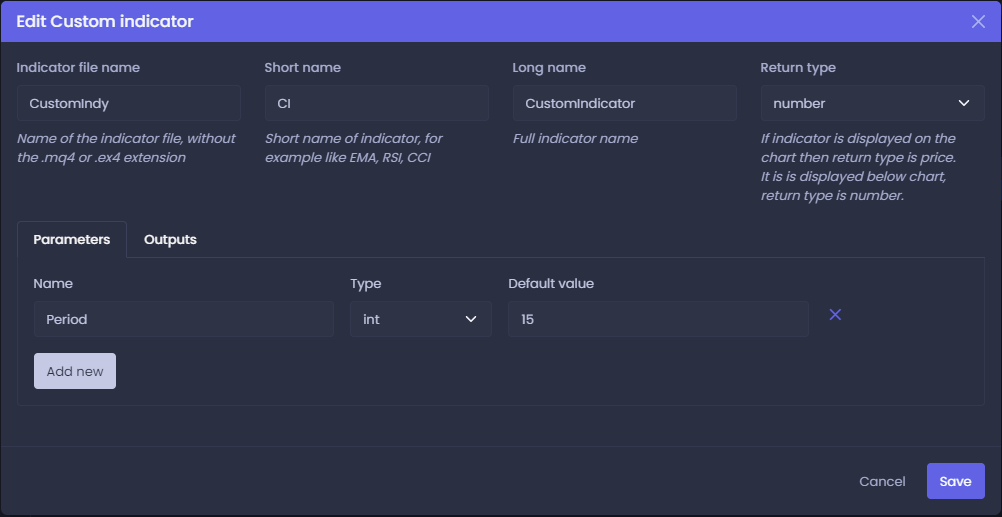
Start by filling in the name of the indicator file without extension.
For example, if you have an indicator file called CustomIndicator.ex4 in your MetaTrader4 platform, just type in CustomIndicator.
Then there is a short and long name. The short name is a name that you will see when using this indicator in editor. The long name is a name that this indicator will be accessible by in editor's Add new block dialog.
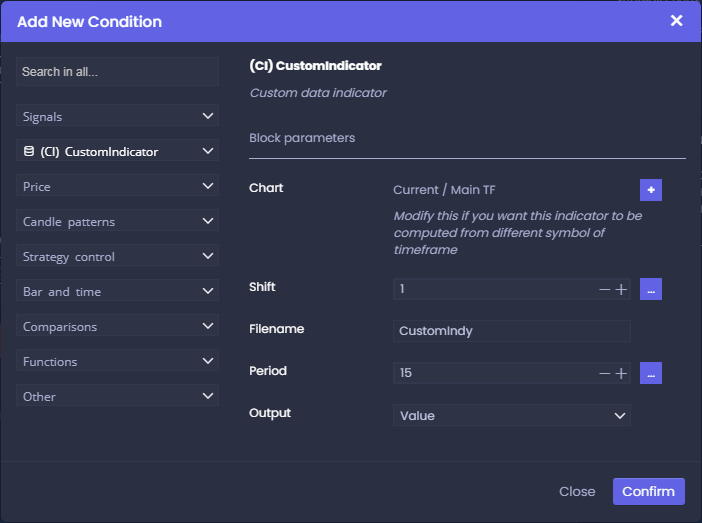
Next to Parameters section, there is also an Outputs section where you define output buffers and source code calls of the indicator:
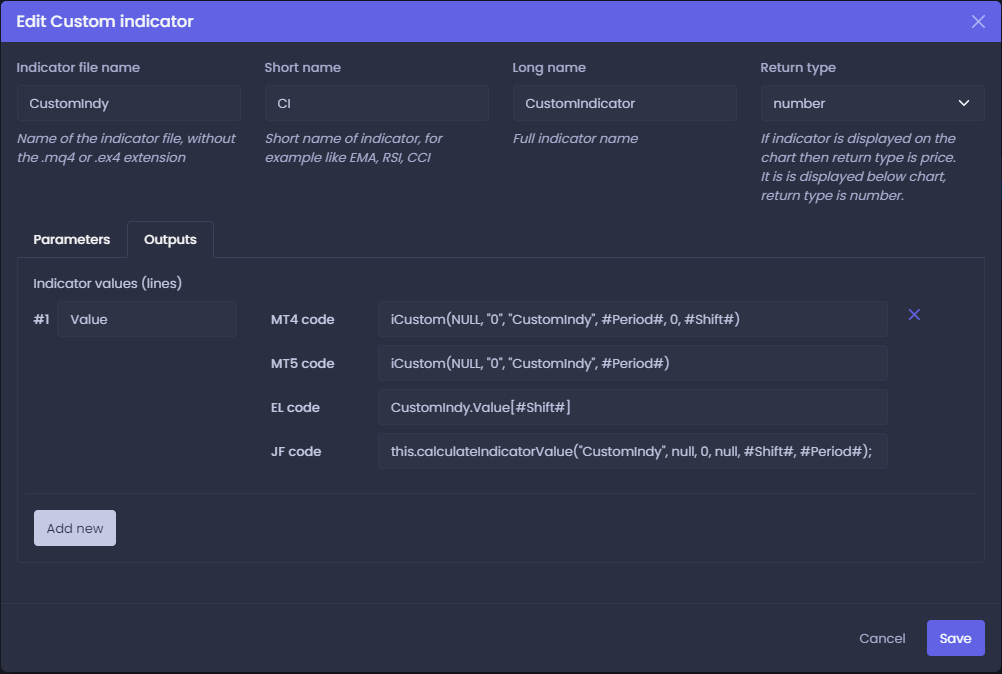
You can add as many outputs as the indicator contains. It is up to you if you define all or just some of them.
First fill in the name of the output. Then define individual source codes you want to use on the right side.
You can refer your predefined parameters by surrounding their names with hashtags (#).
You can also refer shift by using #Shift#.
This is just a demonstration of the use of this feature, you may want to write the code differently depending on the individual indicator you are adding.
After saving the custom indicator, it will be saved in your account and become accessible in the Editor.
You can modify existing custom indicators by double clicking them. For more information, please visit StrategyQuant documentation
Stock groups
Stockpicker strategy trades on group of stocks, not individual assets, and Stock groups is the place where you can manage your groups.
It allows you to create groups of stocks, for example for indexes or sectors.

Stock groups already contains predefined standard indexes, and it enables you to create your own stock groups.
To distinguish stock groups from standard symbols, they are enclosed in [ ], for example [StockGroupName].
Default (uneditable) stock groups provided by us are enclosed in double quotes [[ ]].
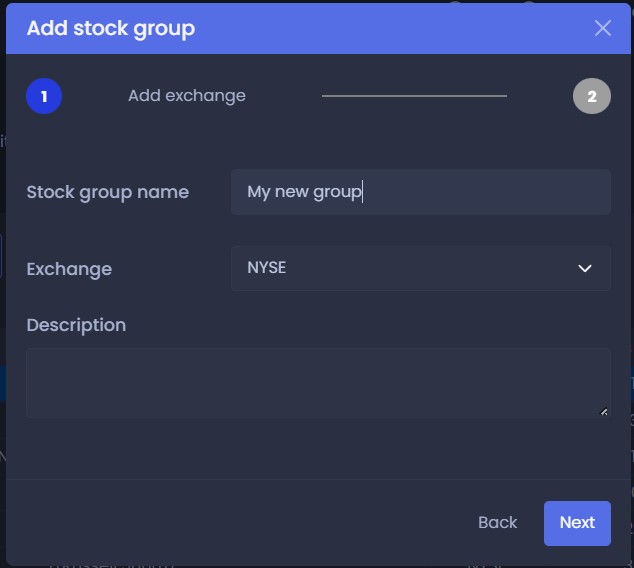
Adding stock group
Adding stock group is done in two steps. In first step you have to define name, exchange and optional description:
The next step is to define which stocks are in group:
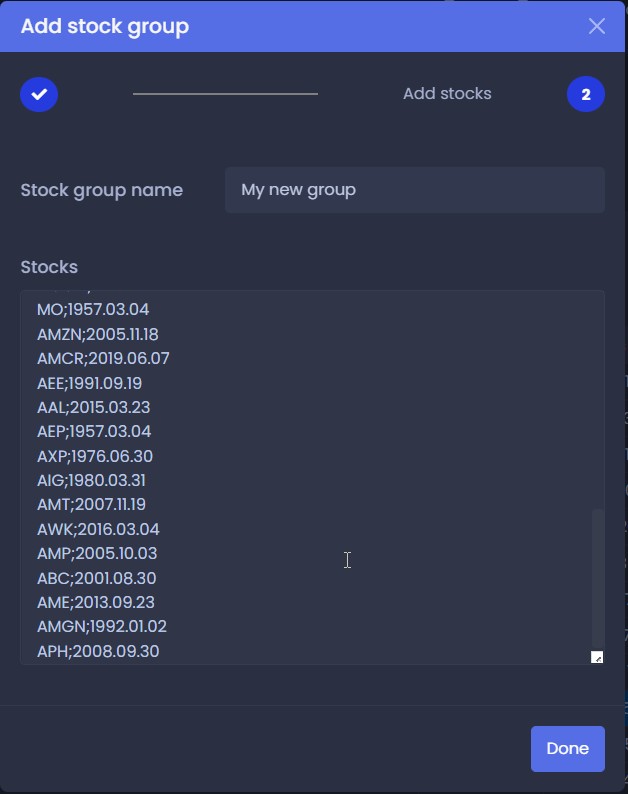
You simply have to put there a list fo stocks, separated by new line. Stocks must be defined by their correct tickers, and they can optionally have two more dates - date when stock was added to the groupm, and date when it was removed - all in YYYY.MM.DD format.
AAPL  <- in case the stock is in group all the time
AAPL;1999.03.04  <- in case stock was added to group on 1999.03.04
AAPL;1999.03.04;2022.11.10  <- in case stock was added to group on 1999.03.04 and removed on 2022.11.10
The dates are important in order to support Survivorship bias – which is important for realistic backtests (more about this in another article) – so you can add also dates from – to when the stock belonged to index.